
Have you ever picked up a printed document from the office printer and struggled to find where the digital file was saved on your computer or local network?
Adding the file path and document name to your Word documents is one of the best ways to ensure document traceability and organization. Whether you are using Microsoft Word 365, Word 2021, Word 2019, or older versions, displaying the folder location makes file retrieval much easier.
In this guide, we will cover the native manual methods to insert a file path in a Word header or footer, explain why these methods often fail to update, and introduce a seamless, one-click automation tool to solve these issues permanently.
Method 1: Insert File Path in Word Footer or Header Using Quick Parts (Manual)
The most common way to add the document location natively is by using Word’s built-in Field feature under the Quick Parts menu.
Step-by-Step Instructions:
- Open your document in Microsoft Word.
- Double-click the Header or Footer area (usually at the very top or bottom of the page) to open the Header & Footer tools.
- Click on the Insert tab in the main ribbon.
- In the “Text” group, click the Quick Parts dropdown menu and select Field….
- In the “Field names” list on the left, scroll down and select FileName.
- In the “Field properties” section in the middle, check the box next to Add path to filename.
- Choose your preferred formatting (uppercase, lowercase, or first capital).
- Click OK.
The full file path and filename will now appear in your header or footer. Double-click anywhere outside the header/footer area to return to editing your document.
Method 2: Insert Document File Location via Keyboard Shortcuts (Field Codes)
If you prefer using keyboard shortcuts over clicking through menus, you can insert the file path field code manually using a quick shortcut.
Step-by-Step Instructions:
- Place your cursor exactly where you want the file path to appear (inside the body, header, or footer).
- Press Ctrl + F9 on your keyboard. This will insert a pair of curly braces that look like this: { }.
- Inside these braces, type exactly: FILENAME \p
- Press F9 to update the field code and display the actual directory path.
To help your article at advanceduser.net rank higher and capture organic search traffic from users looking to insert file paths in Microsoft Word, we need to target both informational intent (users searching for “how-to” manual steps) and transactional/utility intent (users looking for an automated or bulk solution).
Based on an analysis of the top-ranking Google search results, YouTube videos, and Microsoft Community threads, users face several major pain points with Word’s native functionality:
- The steps are too tedious to repeat for every new document.
- File paths do not update automatically if a file is moved or renamed, often printing outdated directory locations.
- Hardcoding paths in the digital file looks unprofessional when sharing clean copies with clients via email, even if the path is needed on internal physical printouts.
Below is an SEO-optimized, comprehensive article designed to rank for these high-volume search terms. It addresses the manual methods first (to capture initial search traffic) and then introduces your tool, MS Word Print With Path Automator, as the ultimate solution to those limitations.
How to Insert File Path and Name in Microsoft Word Header or Footer (Automatically)
Have you ever picked up a printed document from the office printer and struggled to find where the digital file was saved on your computer or local network?
Adding the file path and document name to your Word documents is one of the best ways to ensure document traceability and organization. Whether you are using Microsoft Word 365, Word 2021, Word 2019, or older versions, displaying the folder location makes file retrieval much easier.
In this guide, we will cover the native manual methods to insert a file path in a Word header or footer, explain why these methods often fail to update, and introduce a seamless, one-click automation tool to solve these issues permanently.
Method 1: Insert File Path in Word Footer or Header Using Quick Parts (Manual)
The most common way to add the document location natively is by using Word’s built-in Field feature under the Quick Parts menu.
Step-by-Step Instructions:
- Open your document in Microsoft Word.
- Double-click the Header or Footer area (usually at the very top or bottom of the page) to open the Header & Footer tools.
- Click on the Insert tab in the main ribbon.
- In the “Text” group, click the Quick Parts dropdown menu and select Field….
- In the “Field names” list on the left, scroll down and select FileName.
- In the “Field properties” section in the middle, check the box next to Add path to filename.
- Choose your preferred formatting (uppercase, lowercase, or first capital).
- Click OK.
The full file path and filename will now appear in your header or footer. Double-click anywhere outside the header/footer area to return to editing your document.
Method 2: Insert Document File Location via Keyboard Shortcuts (Field Codes)
If you prefer using keyboard shortcuts over clicking through menus, you can insert the file path field code manually using a quick shortcut.
Step-by-Step Instructions:
- Place your cursor exactly where you want the file path to appear (inside the body, header, or footer).
- Press Ctrl + F9 on your keyboard. This will insert a pair of curly braces that look like this: { }.
- Inside these braces, type exactly: FILENAME \p
- Press F9 to update the field code and display the actual directory path.
Note: The \p switch tells Microsoft Word to include the entire file path alongside the file name. If you remove the \p and only use FILENAME, only the name of the document will show.
The Big Problem with Word’s Native Methods
While the native methods work, they come with three critical flaws that frustrate professional users:
1. File Paths Do Not Update Automatically
If you move your Word document to a different folder or rename it, Word does not automatically update the file path in the footer. The footer will continue to show the old, outdated location. To update it, you must manually double-click the footer, select the field, and press F9, or toggle print preview and return to editing.
2. Tedious Setup for Every Single Document
You have to manually click through the “Quick Parts” menus or type field codes for every new document you create. While you can save this setup in a custom template, applying it retroactively to existing files is highly repetitive.
3. Messy Digital Files
Oftentimes, you only want the file path printed on physical paper for internal tracking. If you email the .docx or PDF to a client, you likely do not want them seeing your internal local drive structure (such as C:\Users\YourName\Documents\Confidential).
To force Word to update fields automatically before printing, you can go to File > Options > Display and check Update fields before printing. However, this still leaves the path permanently saved in the digital copy of the file.
Method 3: The Automated, “Set-and-Forget” Solution
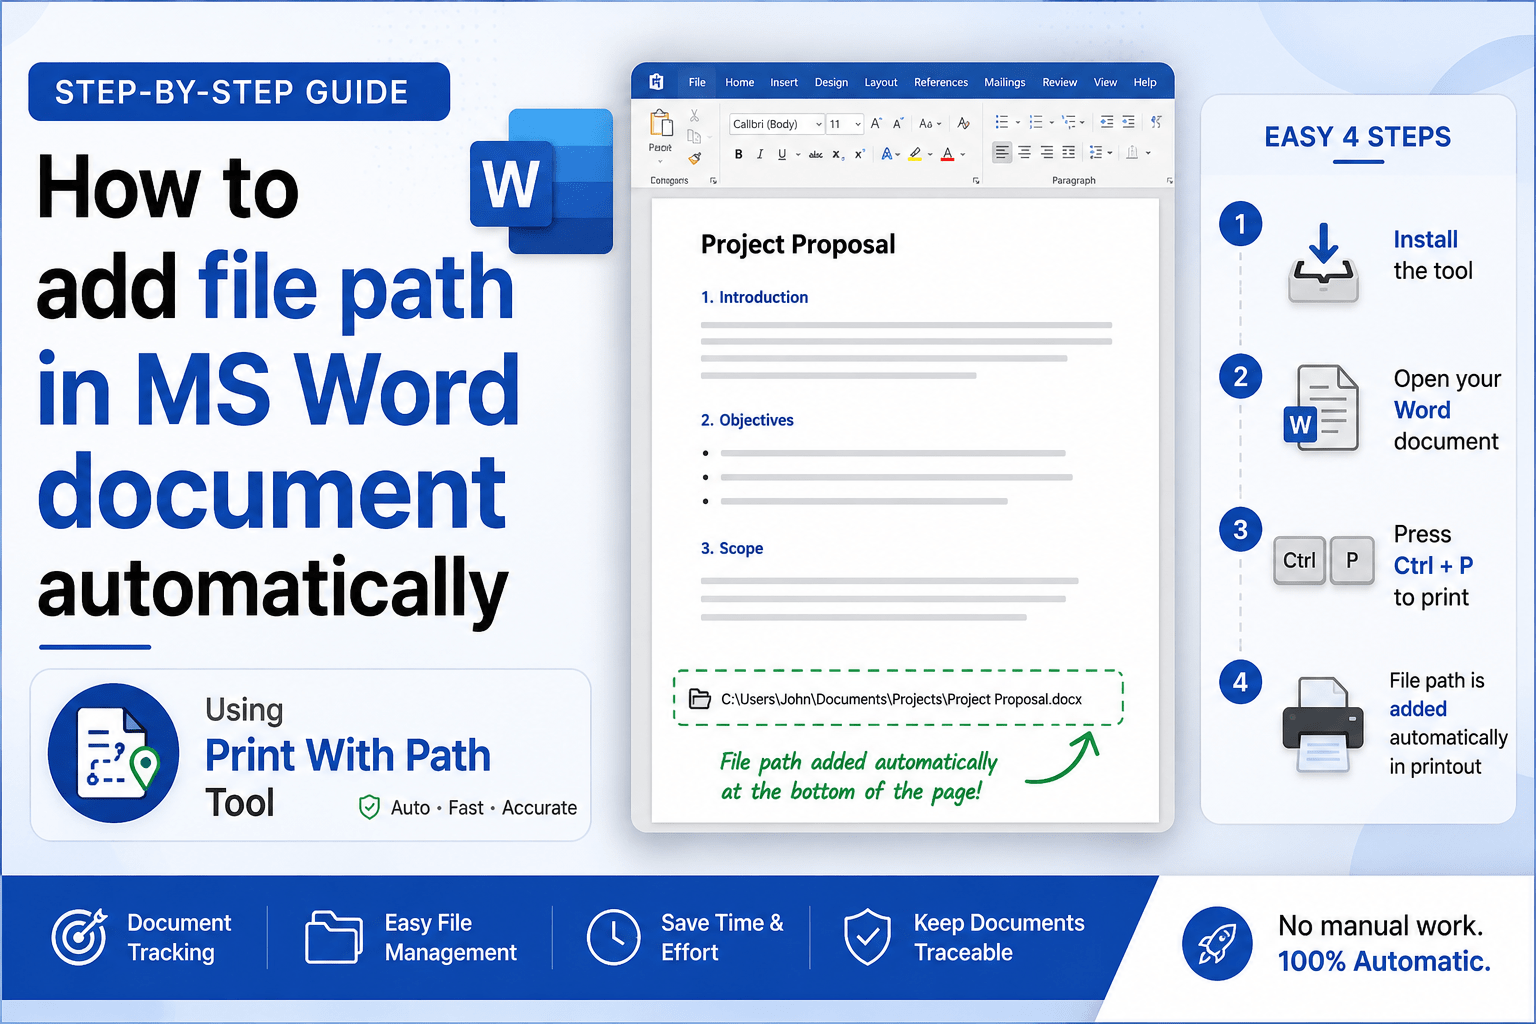
If you want an automatic way to print the folder location at the bottom of a Word document without manually inserting fields or leaving ugly paths in your clean digital files, the most efficient option is to use a dedicated utility.
The MS Word Print With Path Automator is a lightweight, open-source tool designed to automate document tracking.
Key Features of MS Word Print With Path Automator:
- Temporary Watermark: The tool automatically adds the file path to the footer only during the printing process. Once printed, the path is automatically removed from your digital document, keeping your shared files clean.
- Seamless Keyboard Integration: It works alongside standard print workflows. When you press Ctrl + P, the path is temporarily added to the physical printout.
- No Manual Word Field Codes: You do not have to mess around with Ctrl+F9 or the Quick Parts menus. The tool handles everything in the background using an automated VBA global template.
- Universal Compatibility: Supports all major versions of Word, including Microsoft Word 365, Word 2021, 2019, 2016, 2013, and 2010.
- Easy Office Deployment: It comes with a professional installer (built via Inno Setup) that copies the required .dotm file directly into your Microsoft Word Startup folder.
How to Install and Use the Automator:
- Download the utility directly from MS Word Print With Path Automator on SourceForge.
- Run the simple setup wizard to register the template.
- Open any Word document and print it using the Ctrl + P command. The document path will be printed on the bottom of the page.
- If you ever need to print a clean document without the path, simply use the mouse to click File > Print instead.
Frequently Asked Questions (FAQ)
How do I remove a file path from a Word footer?
If a file path was manually added, double-click the footer area to edit it. Highlight the file path text (it may turn gray when clicked, indicating it is a field code) and press the Delete or Backspace key on your keyboard.
Can I insert a partial file path in Word?
Natively, the FILENAME \p field code only supports showing either the entire path or just the filename alone. Showing a partial path (like only the last two folders) is not natively supported by standard fields and requires writing custom VBA macros.
Why is my file path showing “Document1” instead of the folder location?
If your file path shows as “Document1” or does not contain directory folders, it means the document has not been saved yet. Save your document to your hard drive or network storage first, then press F9 to update the field.
Summary of Options
| Feature | Native Quick Parts (FILENAME \p) | Print With Path Automator |
|---|---|---|
| Setup Time | Manual configuration for every file | One-time install (automatic) |
| Path Updates | Must be manually updated (F9) | Always up-to-date on printout |
| Digital Cleanliness | Path is saved permanently in file | Path self-removes after printing |
| Ease of Use | High click-count / complex shortcuts | Natural printing workflow |
For those managing high volumes of physical documentation, utilizing an automated tool helps avoid mistakes and saves time compared to manual entry. You can download the setup file for your PC on SourceForge.